User Guide for Creating Agents
This guide provides a full walkthrough for building, configuring, and deploying agents in Sandstone’s Agent Builder. Playbook agents help automate negotiations, review documents, and enforce business workflows with consistency and accuracy.
1. Access the Agent Builder
- From the left-hand navigation, select Agent Builder under the Operate section.
- This opens the starting screen for creating new playbook agents.
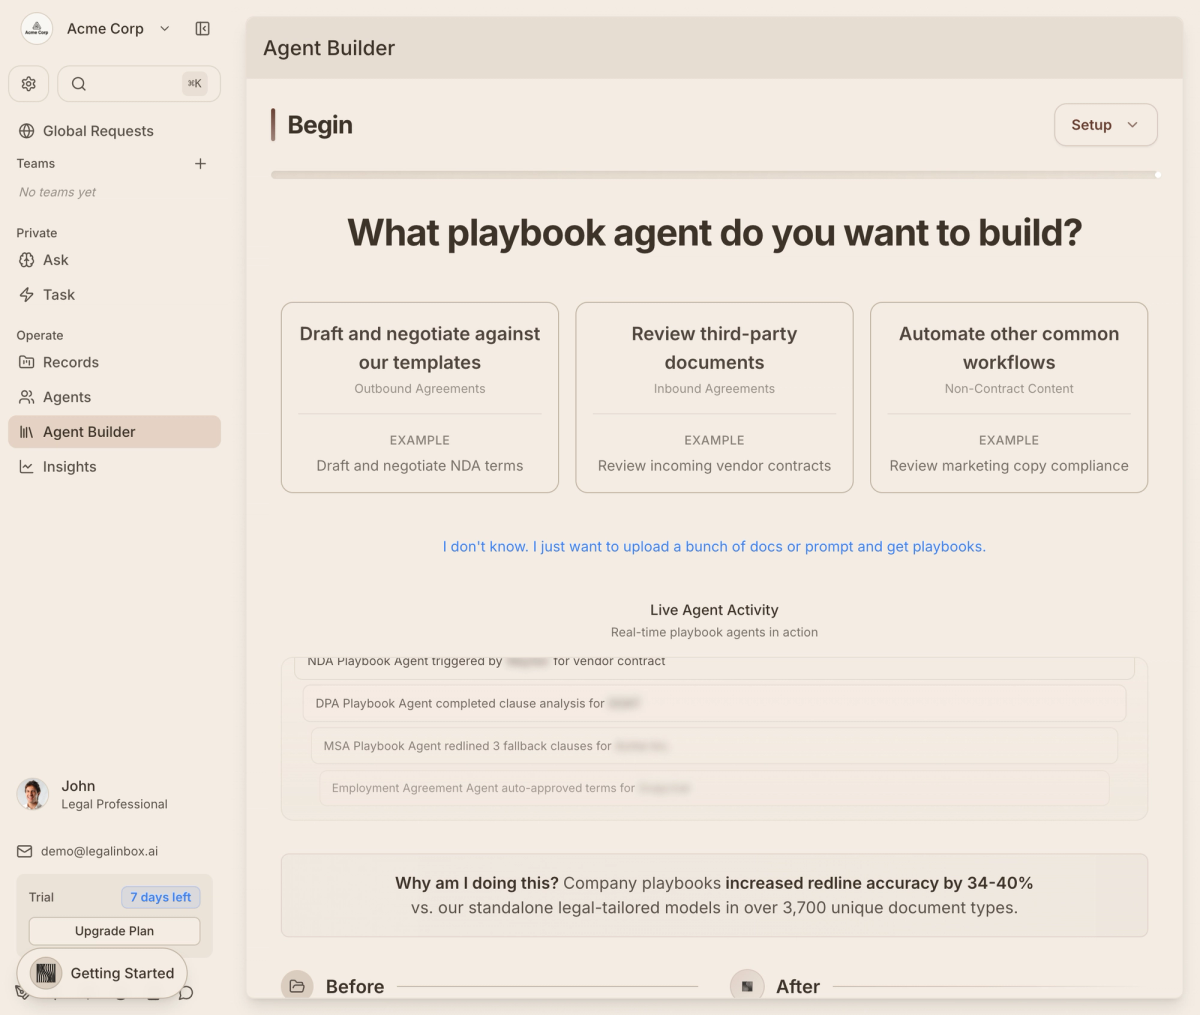
2. Choose Your Agent Type
On the Begin screen, select what kind of agent you want to build:
- Draft and negotiate against our templates
Outbound agreements (e.g., NDAs, MSAs).
Example: Draft and negotiate NDA terms. - Review third-party documents
Inbound agreements (e.g., vendor contracts).
Example: Review incoming vendor contracts. - Automate other common workflows
Non-contract tasks.
Example: Marketing copy compliance.
Not sure? Choose “I just want to upload a bunch of docs or prompt and get playbooks.”
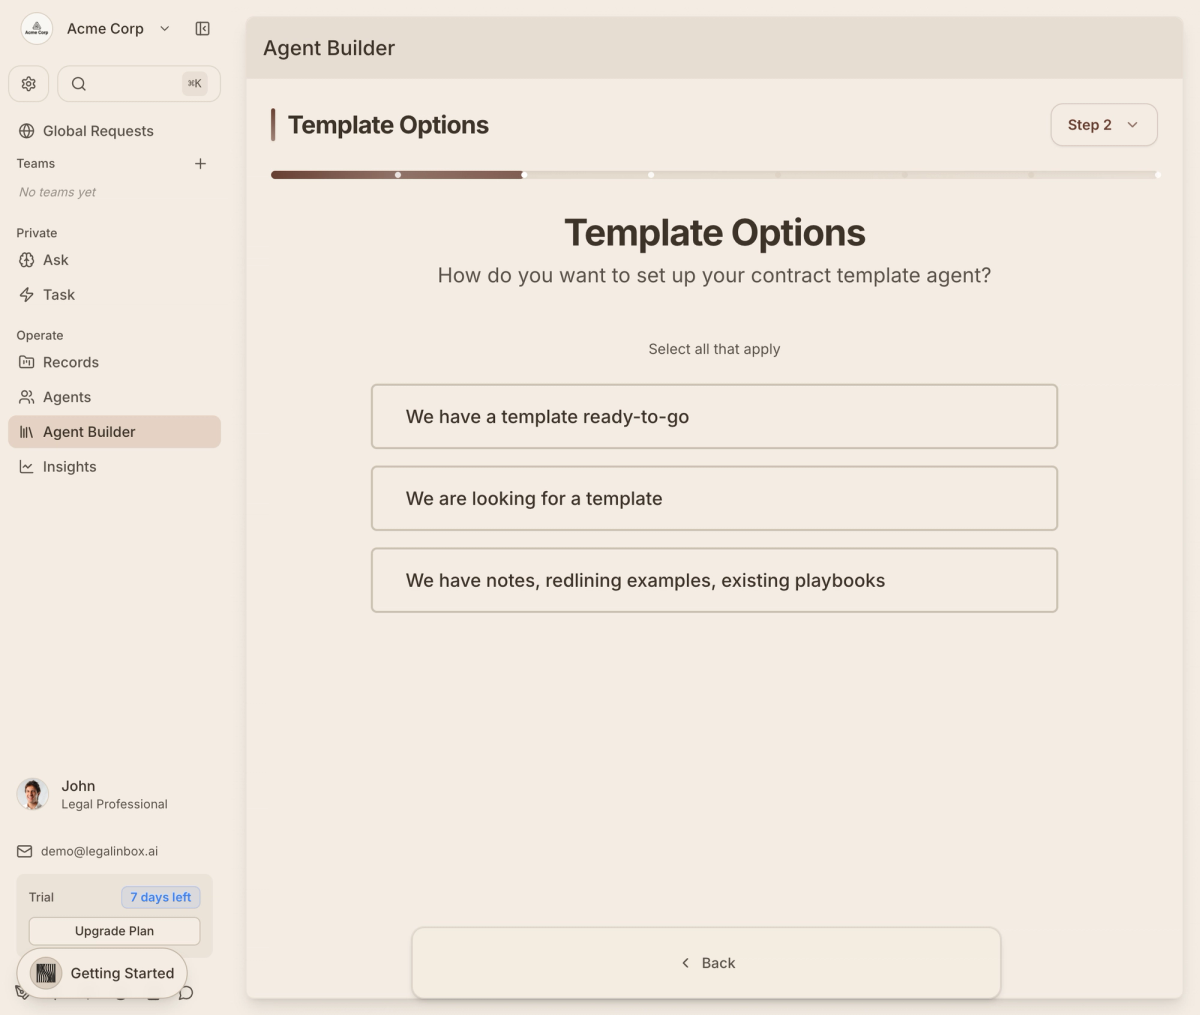
3. Select Template Options
If you’re building from templates, you’ll be asked:
“How do you want to set up your contract template agent?”
Options include:
- We have a template ready-to-go
- We are looking for a template
- We have notes, redlining examples, existing playbooks
You may select more than one.
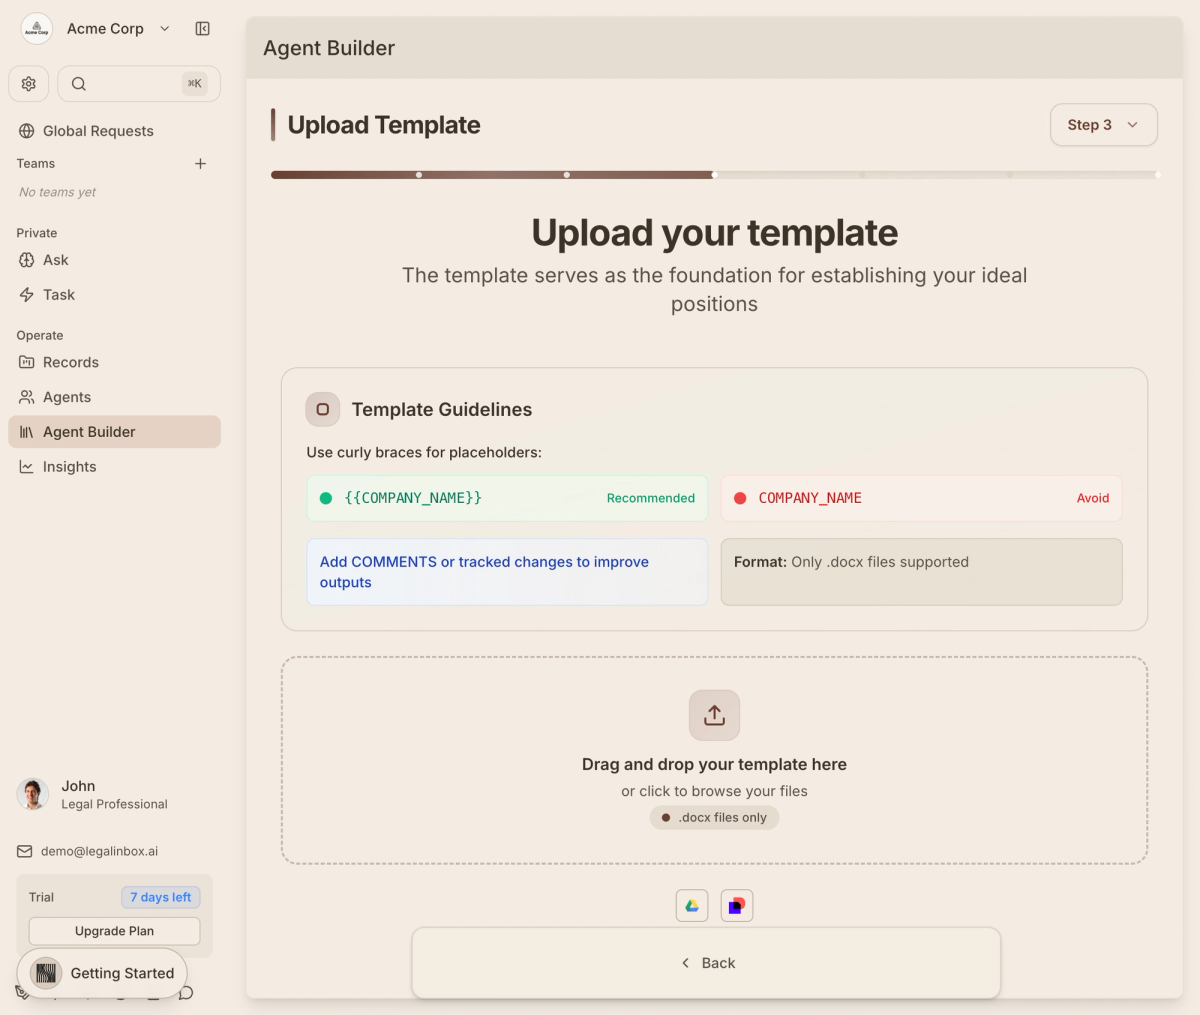
4. Upload Your Template
On the Upload Template screen:
- Format:
.docxfiles only. - Guidelines:
- Use placeholders with curly braces →
{{COMPANY_NAME}}✅ - Avoid plain placeholders like
COMPANY_NAME❌ - Add tracked changes or comments for more accurate outputs.
- Use placeholders with curly braces →
Drag and drop your template into the upload box.
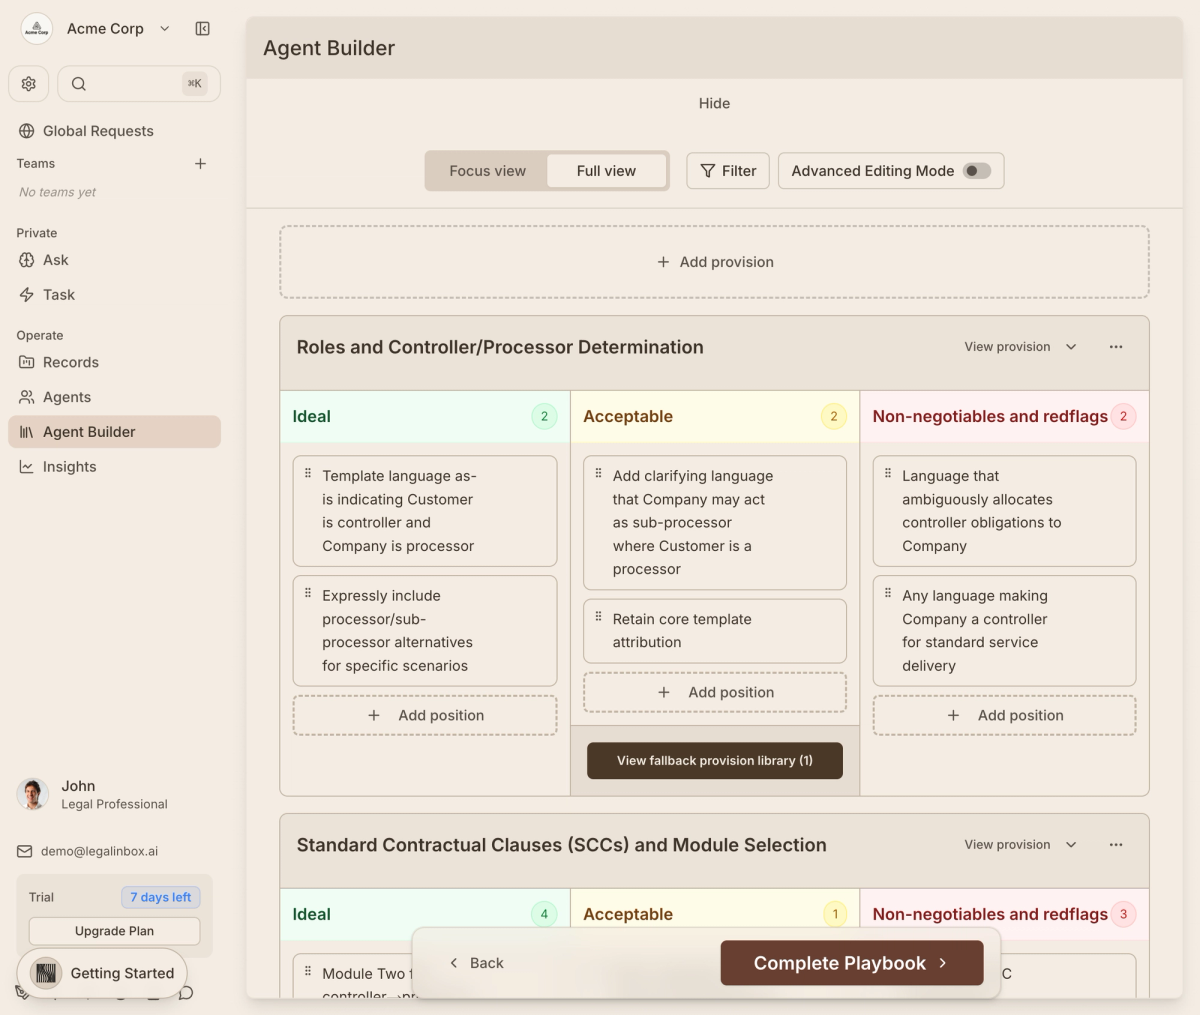
5. Build and Refine the Playbook
After upload, Sandstone generates a draft playbook based on your materials. You can refine it by editing negotiation logic.
- Provisions are displayed with three categories:
- Ideal – your preferred outcome.
- Acceptable – fallback terms you can agree to.
- Non-negotiables & red flags – terms to reject or escalate.
- Actions available:
- Add new provisions.
- Expand from the fallback provision library.
- Switch between Focus view and Full view.
- Enable Advanced Editing Mode for deeper customization.
Click Complete Playbook once ready.
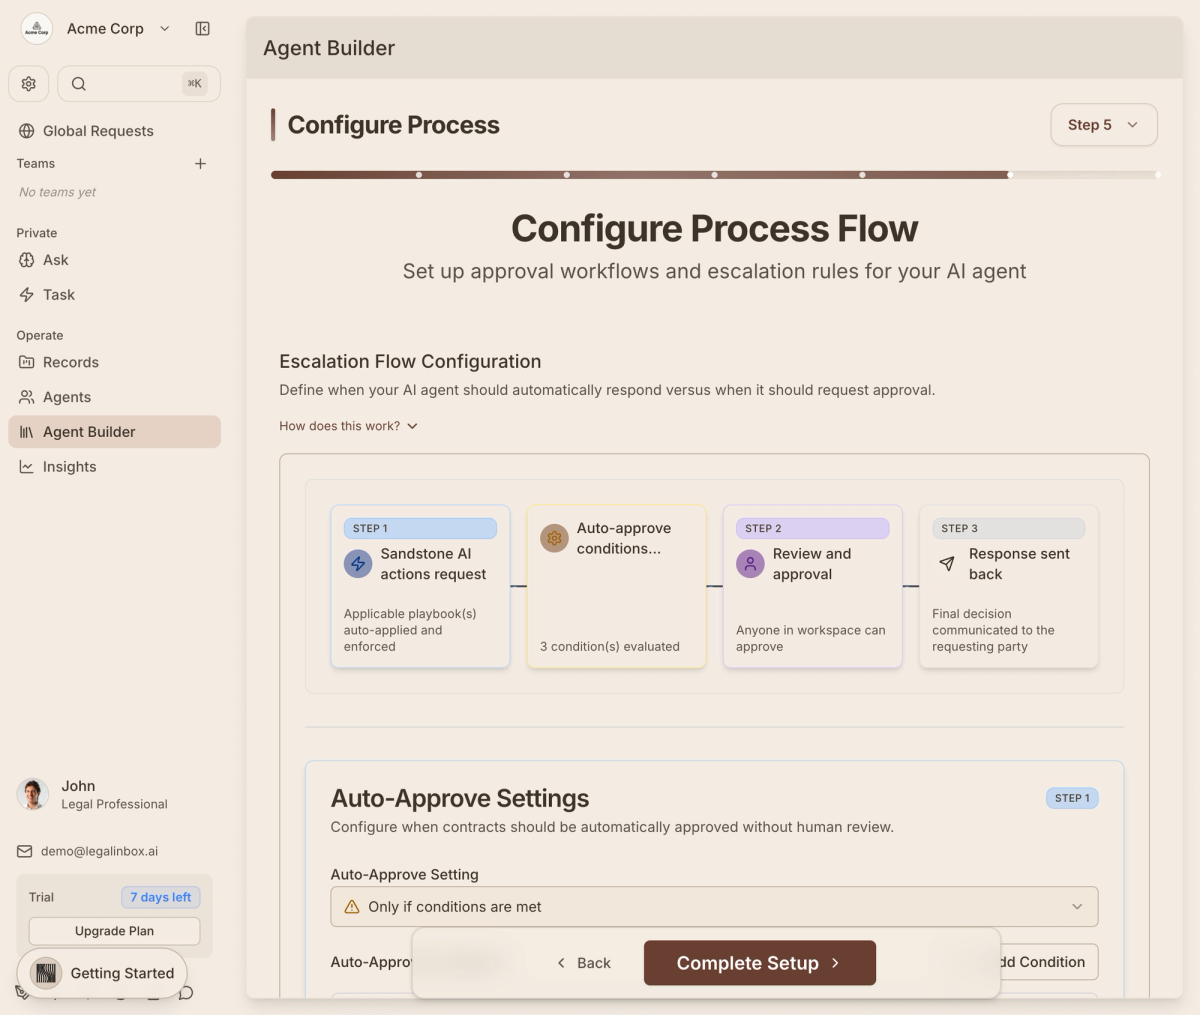
6. Configure Process Flow
Next, set up escalation and approval rules:
- Escalation Flow Configuration defines how the agent handles requests.
- Step 1: Sandstone AI actions request.
- Step 2: Auto-approve conditions checked.
- Step 3: Review and approval (if needed).
- Step 4: Response sent back.
- Auto-Approve Settings:
Configure which conditions allow automatic approval without human review.
Example: “Approve if clause aligns with template language.”
Click Complete Setup when done.
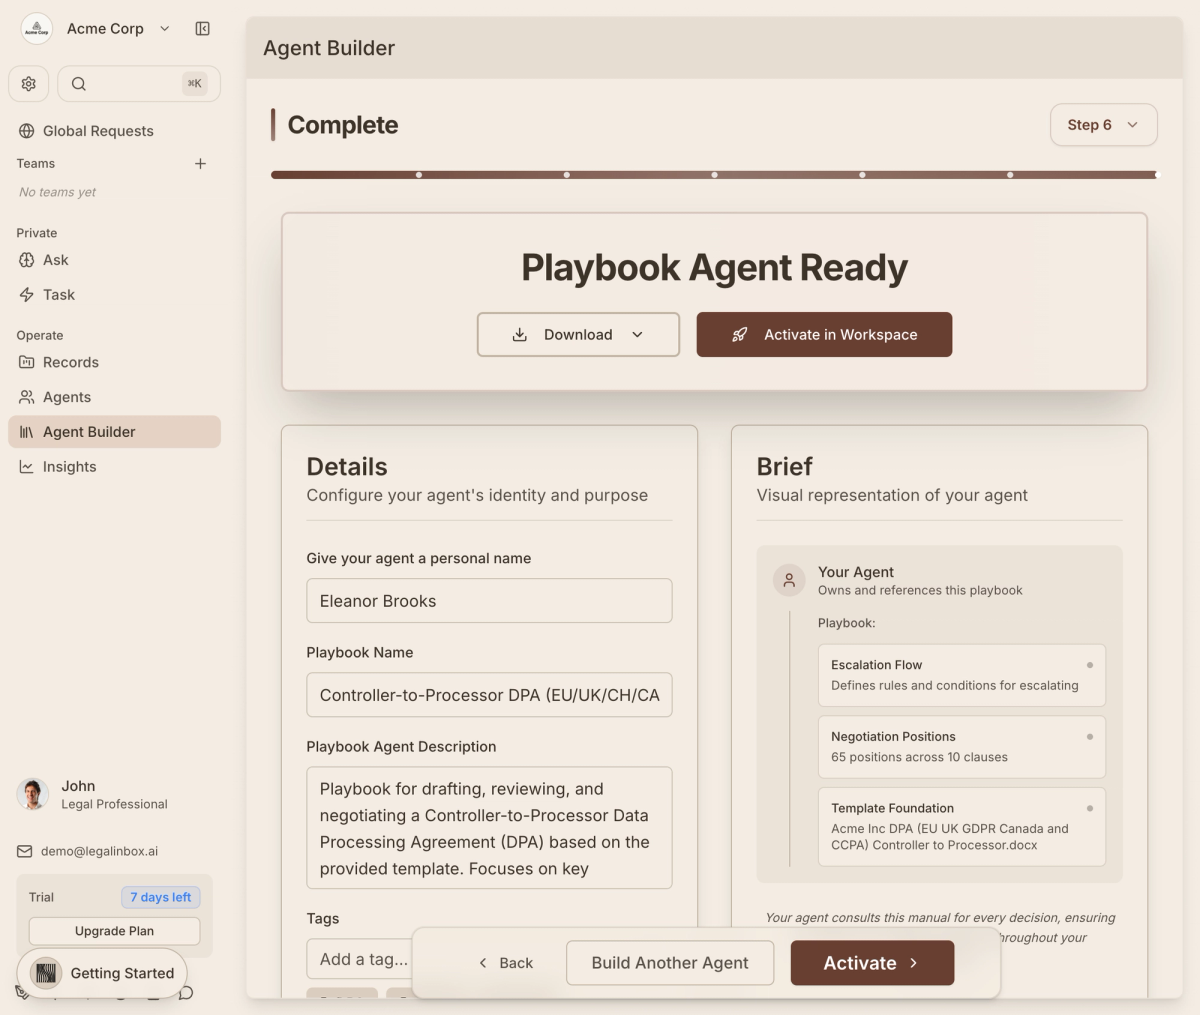
7. Finalize & Deploy
On the Complete screen:
- Give your agent a name (e.g., “Evelyn Marsh”).
- Set a playbook name (e.g., “Work Trial Agreement”).
- Write a description explaining its purpose.
- Add tags for easier organization.
You’ll see a Brief summary with:
- Escalation Flow
- Negotiation Positions
- Template Foundation
Deploy Options:
- Download → Export your agent details.
- Activate in Workspace → Launch your agent for live use.
Once activated, the agent will begin managing documents, enforcing playbooks, and escalating exceptions according to your setup.
Best Practices
- Start simple – begin with one workflow, expand over time.
- Use tracked changes in templates to teach agents preferred edits.
- Iterate playbooks based on live activity logs.
- Balance automation & review – use auto-approval only for low-risk conditions.
- Name agents clearly so team members understand their purpose.
Troubleshooting
- Agent rejects uploads? Ensure file format is
.docx. - Provisions missing? Add them manually or pull from fallback libraries.
- Escalations too frequent? Adjust auto-approve conditions.
- Agent inactive after setup? Confirm activation in workspace.
With this workflow, you’ll be able to design, refine, and deploy contract-ready agents that save time and ensure consistency across negotiations.